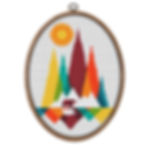
Joshua Tree National Park Cross Stitch Kit
$32.00Price
Cross stitch the national park where two deserts meet and is home of the Joshua Tree. Includes everything you'll need to get started!
Includes:
- Printed set of patterns of the cross stitch design (see below for further details)
- Color Key sheet with thread count
- All thread colors required for the design
- Round embroidery hoop (plastic with wood pattern)
- Set of 3 blunt point cross stitch needles
- Needle Threader
- 16 count aida cloth in white
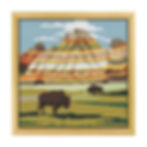
Printed Pattern Details: (examples of printed patterns can be seen in the product images - you will receive the pattern you purchased)
- Pattern with color blocks
- Pattern with color symbols
- Pattern with color blocks and symbols
- Pattern with black and white symbols (best for use with color blindness)
- Pattern with color crosses
*For help and additional resources, check out the "Getting Started" and "Tips and Tricks" tabs
Note: Patterns are licensed for personal use only, not for commercial use. The pattern may not be shared, copied, resold, or relicensed